Cats To Draw Step By Step
Cats To Draw Step By Step - Cat Meme Stock Pictures and Photos
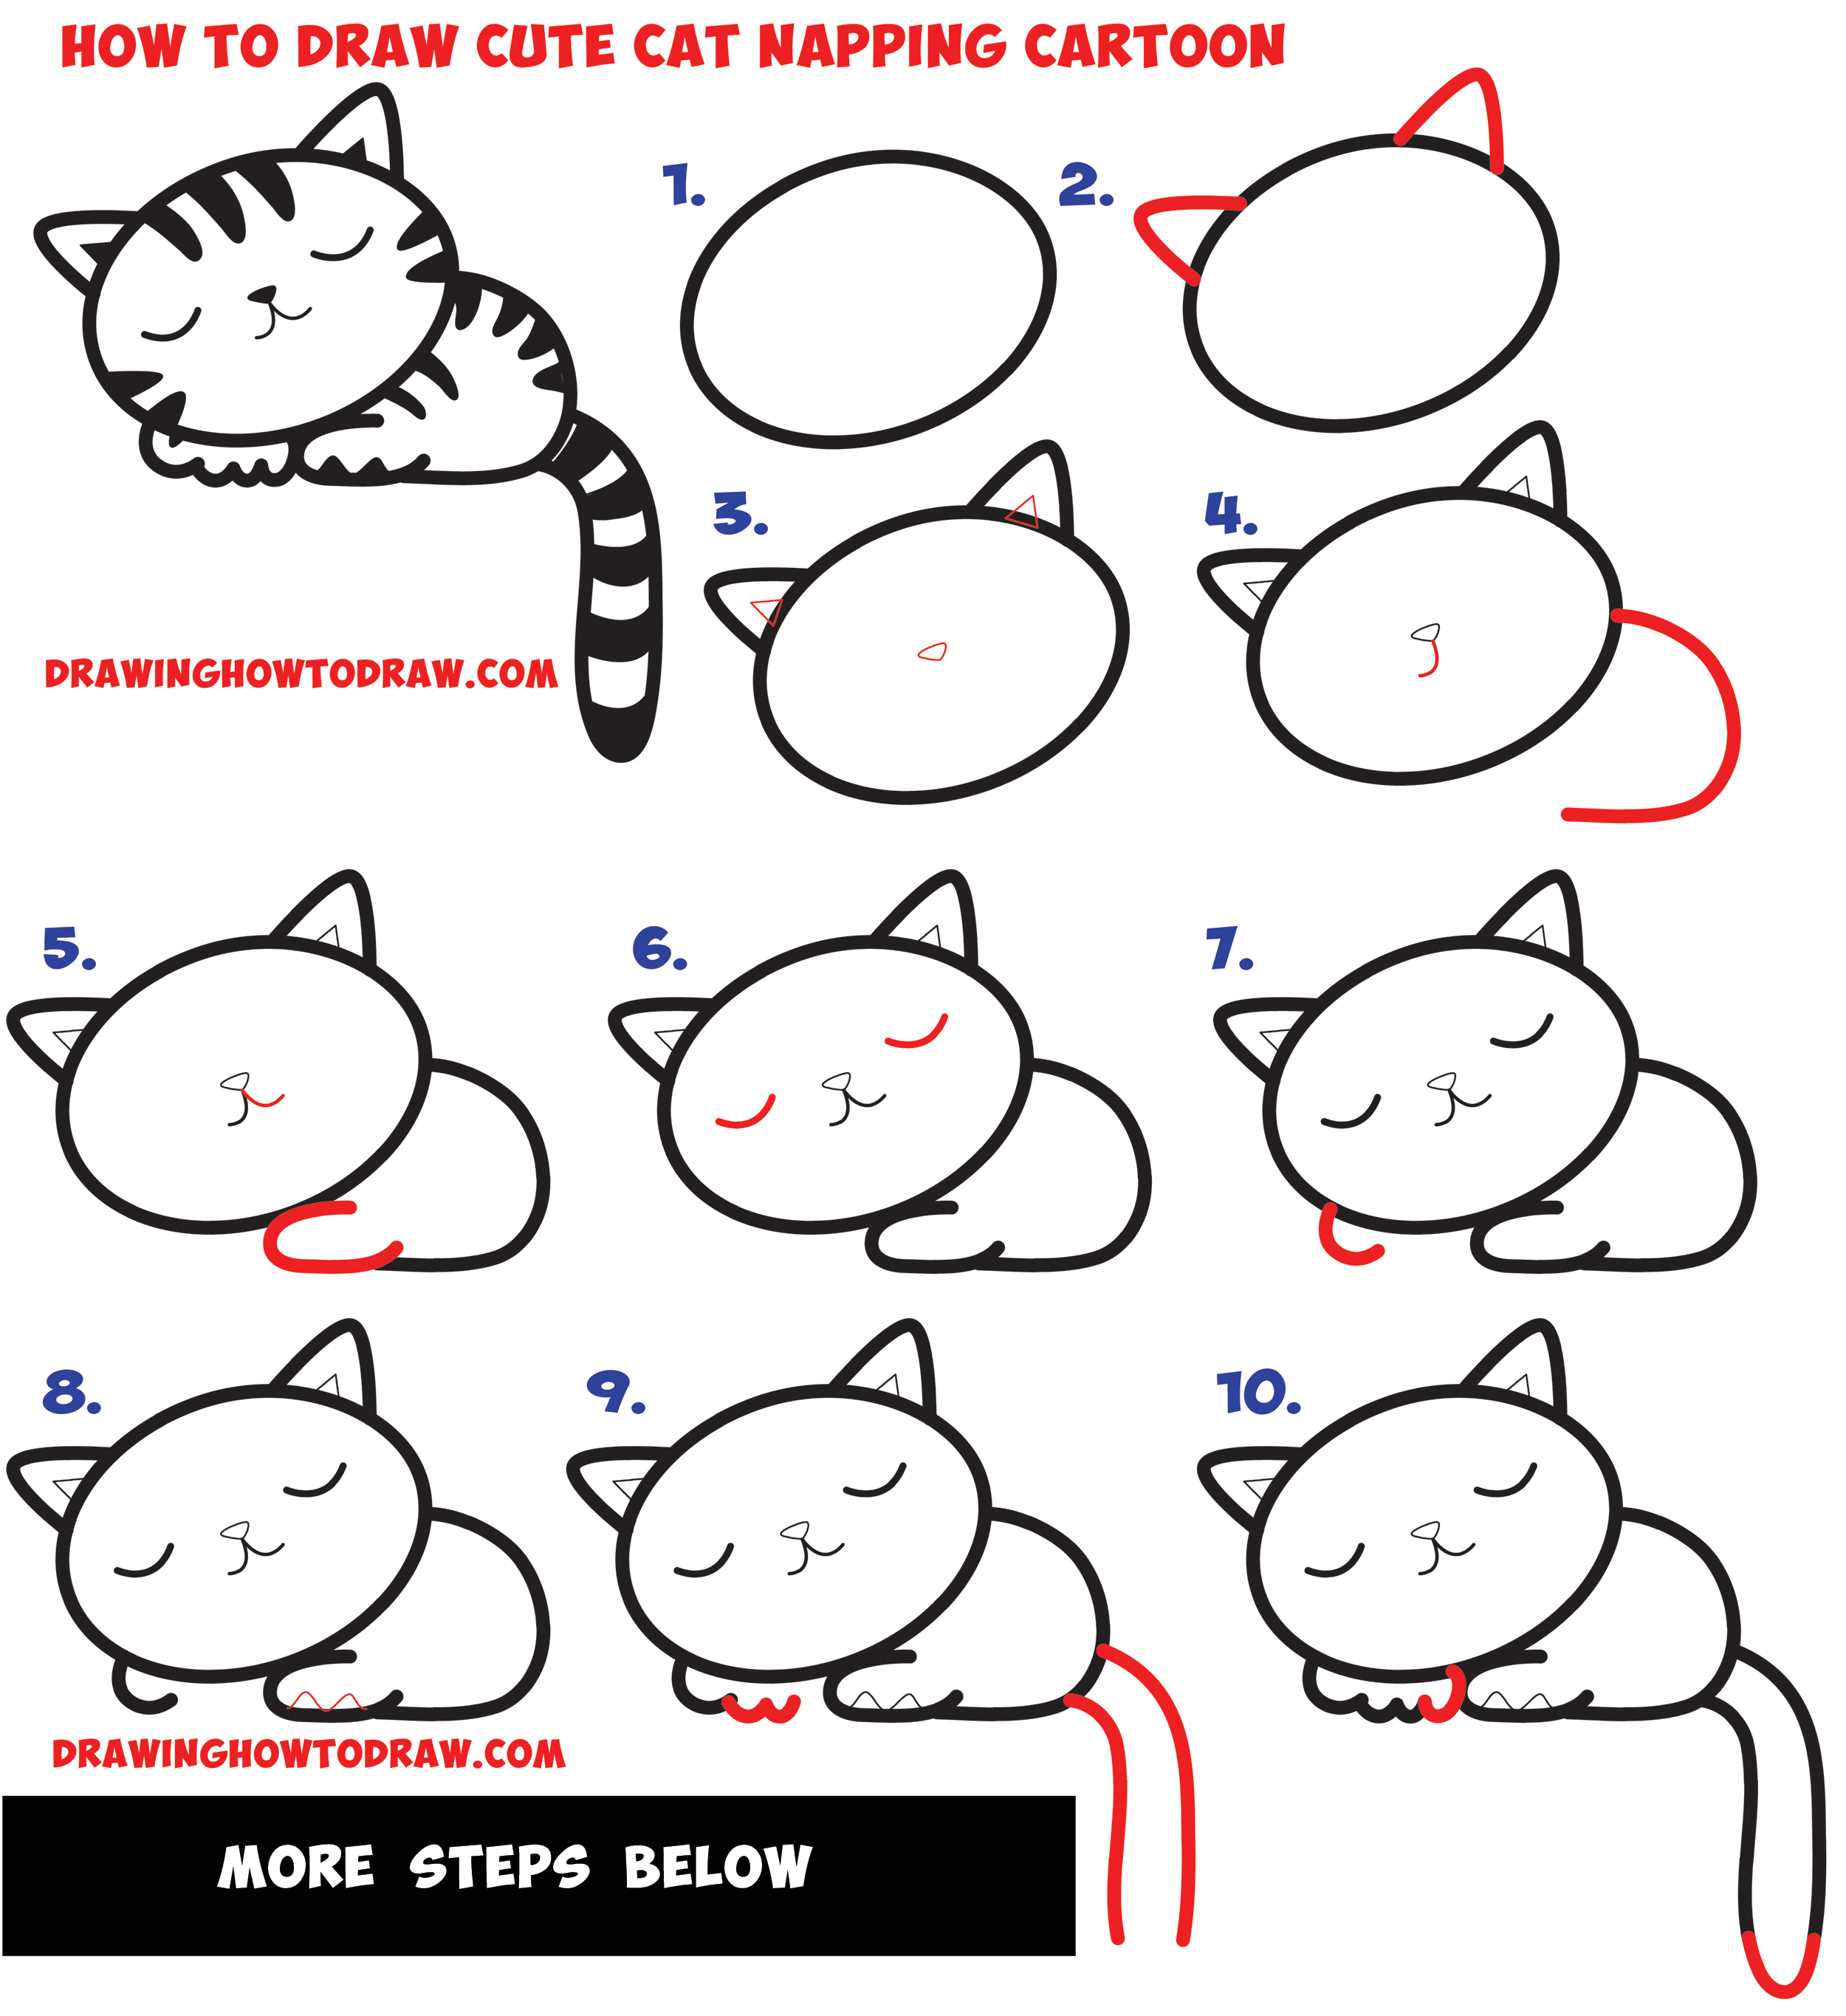
How to Draw a Supercute Kawaii / Cartoon Cat / Kitten Napping Easy Step
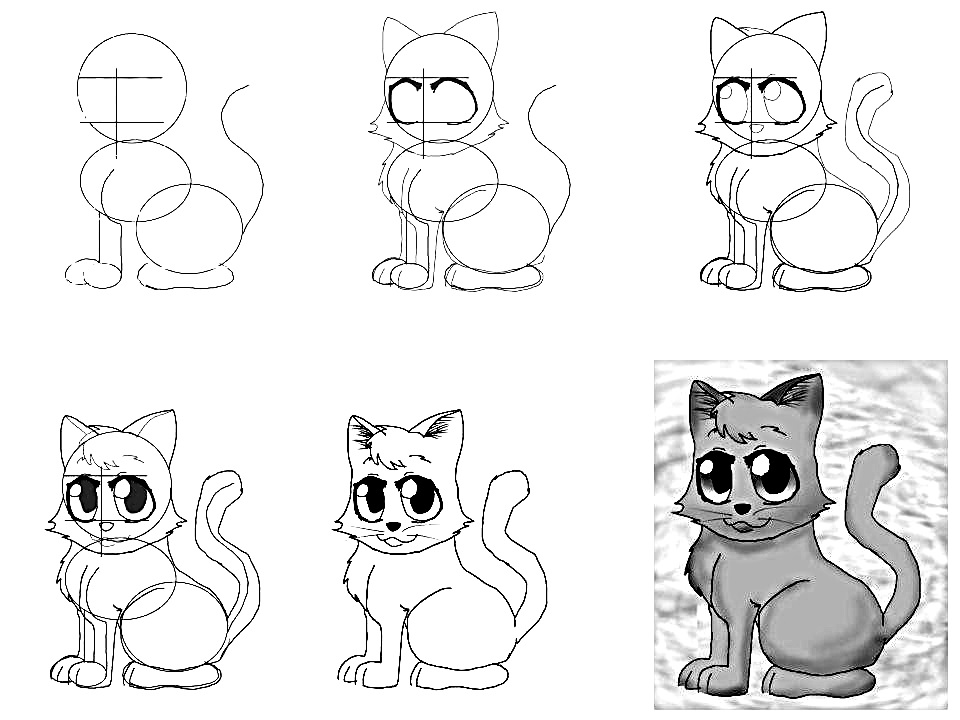
How to draw anime cat 10 stepbystep drawing instructions for
20 Easy Cat Drawing Step by Step Tutorials Simple Cat Sketch
20 Easy Cat Drawing Step by Step Tutorials Simple Cat Sketch

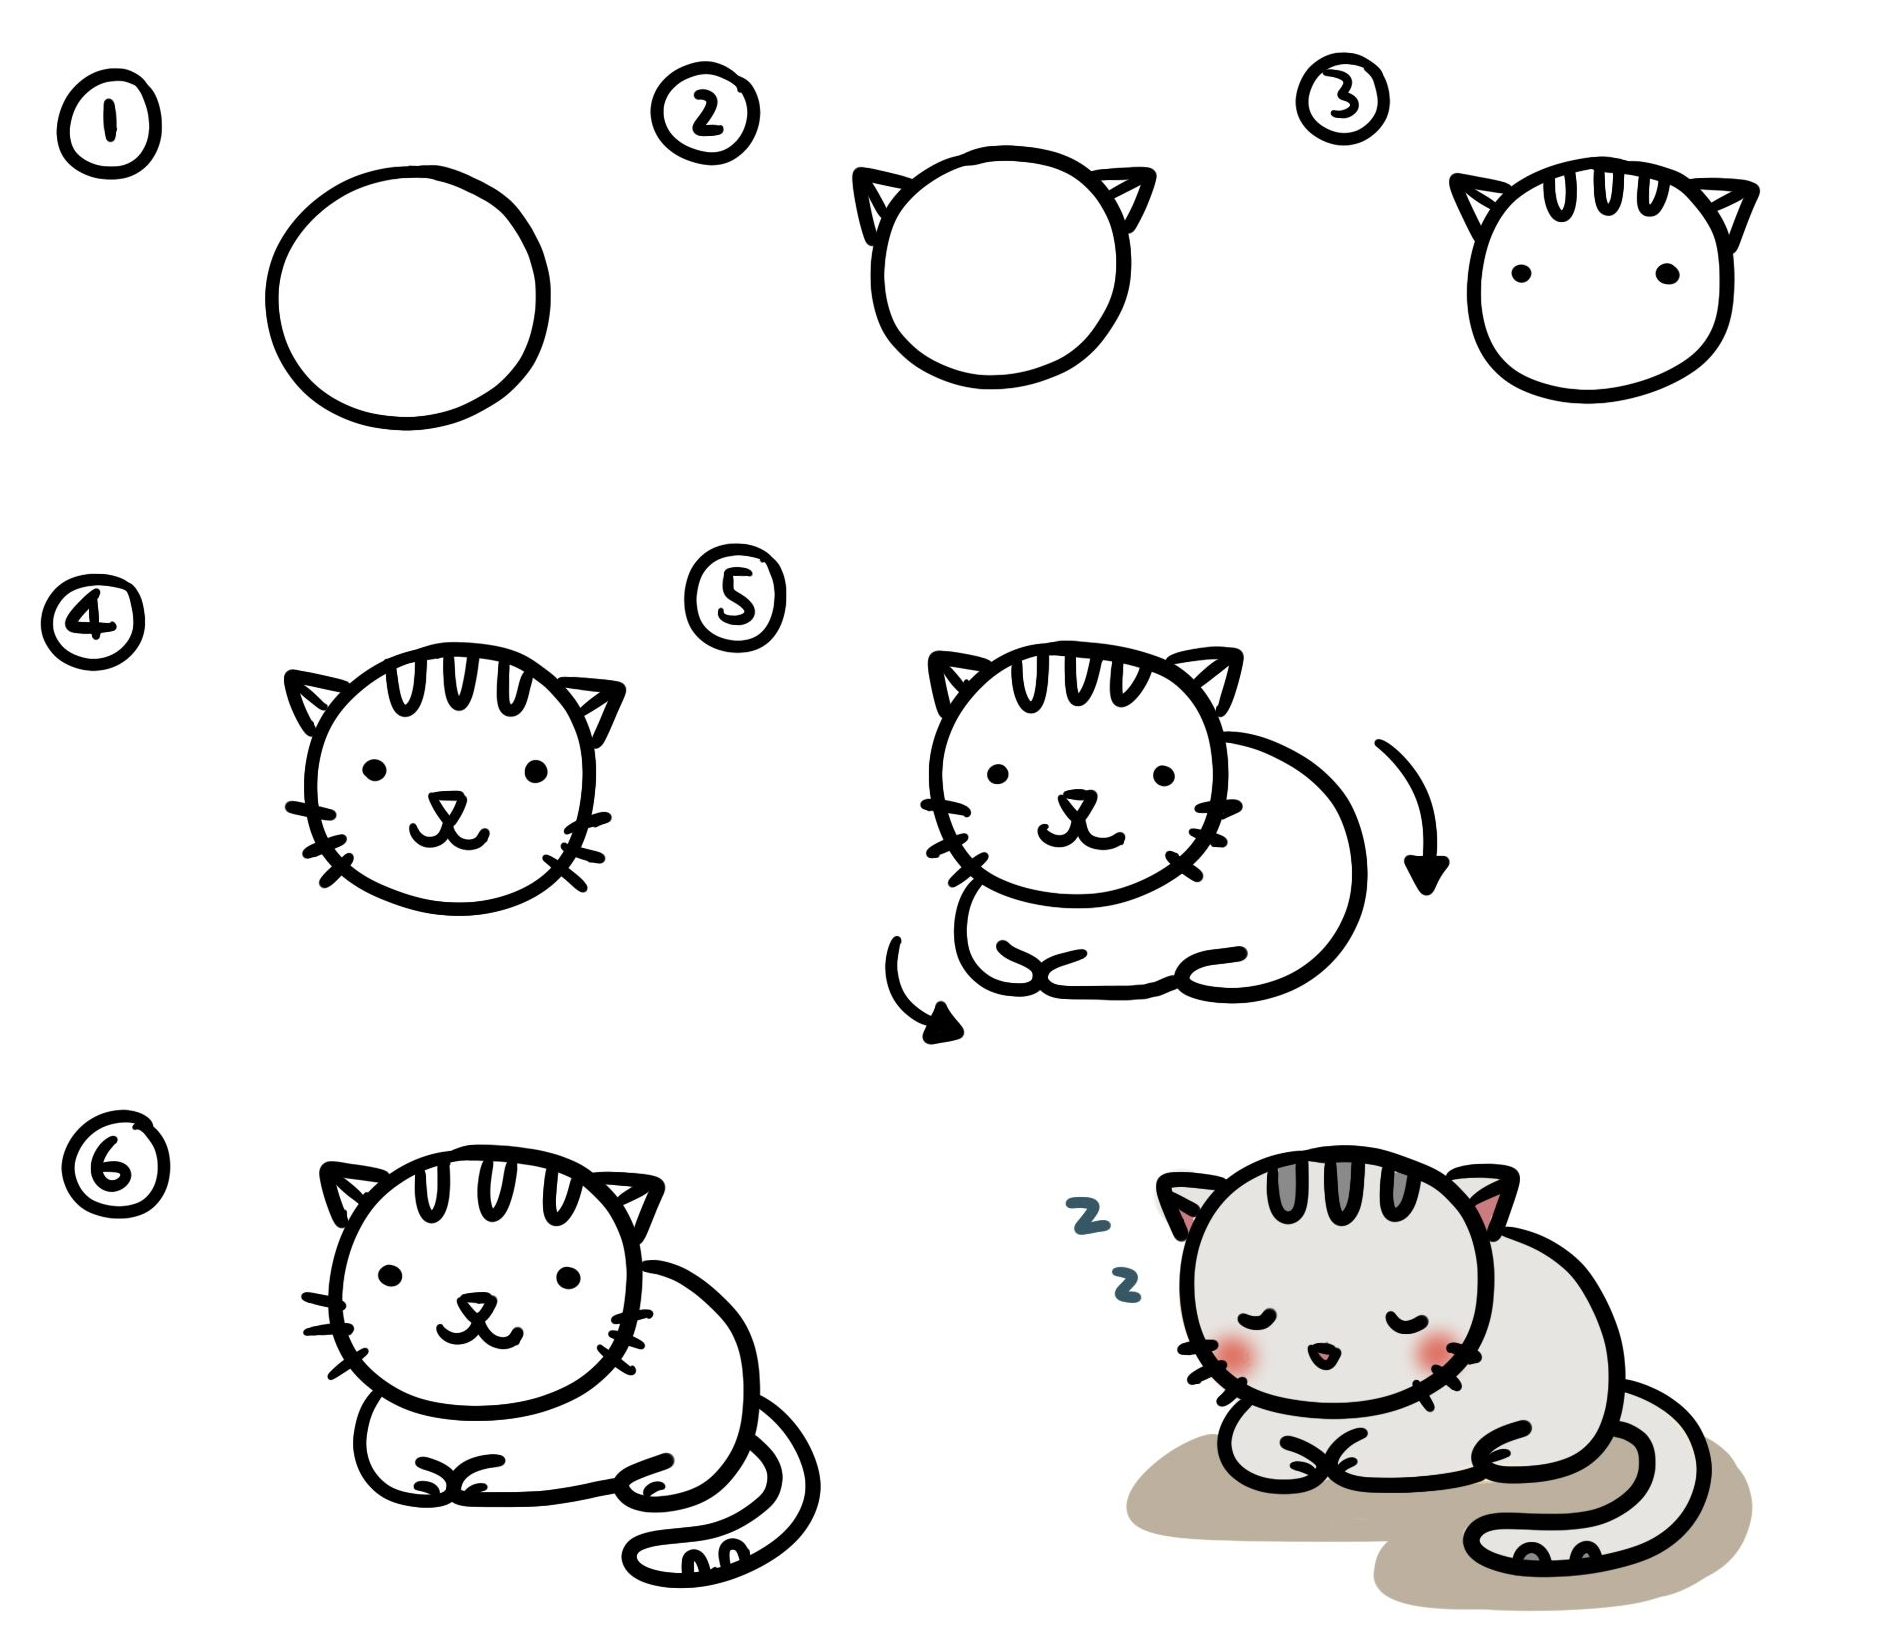
How to draw cute kitten cat step by step tutorial Trends Gambar
How to draw anime cat 10 stepbystep drawing instructions for
Draw one side of the cat’s paw.
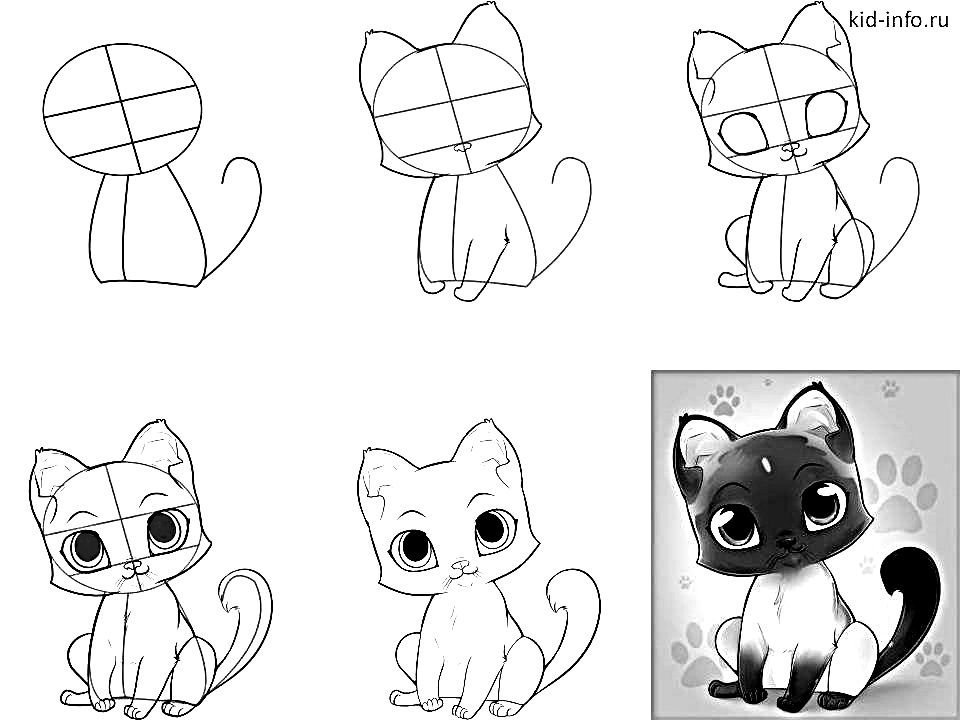
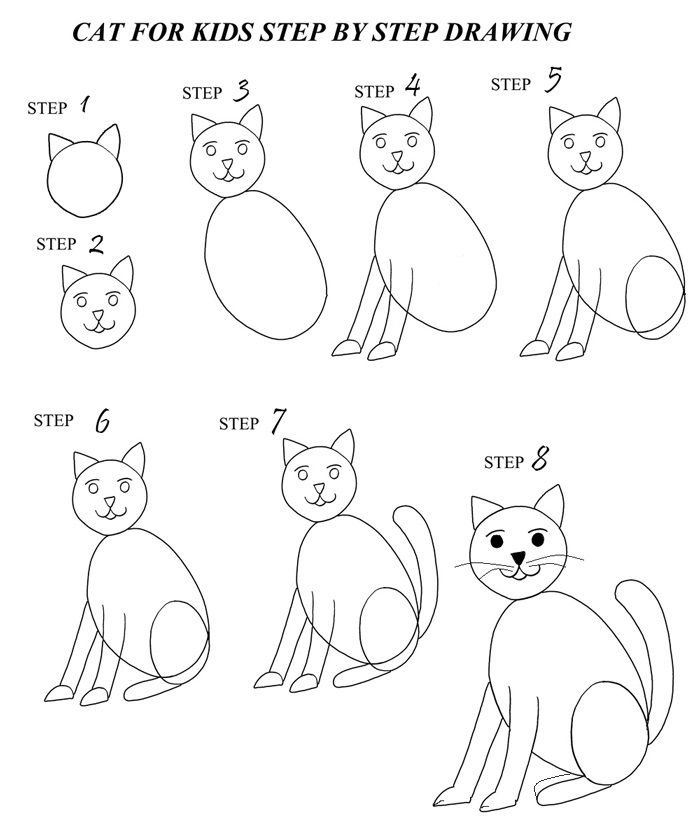
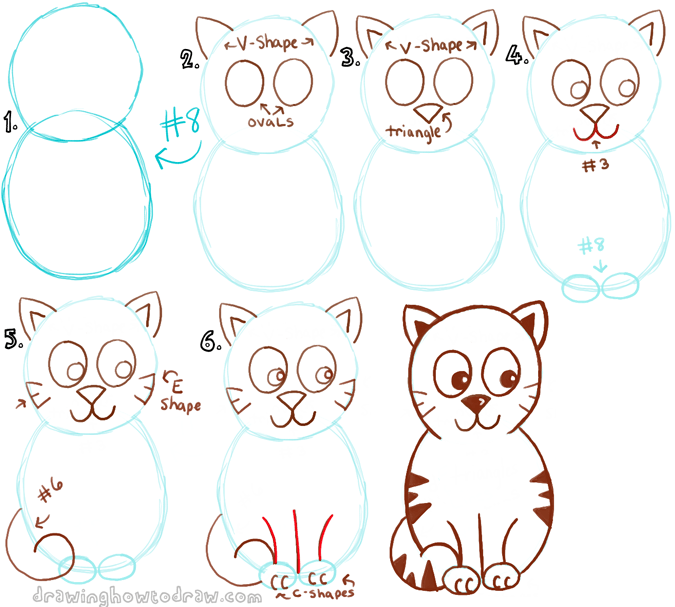
Cats to draw step by step. Always keep in mind, that the thing, that you are drawing does exist in a three. For this step, it’s very important that we connect the intersection between our two circles with the right side of our cat’s head (our left) with a curvy line. Now add some mass / form to the stick figure cat.
Starting next to this line (on the left) draw the mouth curve, bring it down and up again to meet the line you made under the nose. And then add a chin to your drawing. They have a very cute appeal to themselves.
Then using freehand or the aid of a ruler. Now make the mouth by drawing a small opening. Here’s an easy way to get started with your own cat drawing lessons:
These vertical lines should stop once there are on par with the top of the initial vertical line in step 2. Draw the nose similar to a triangle but with rounded sides/corners. From the top corners of this “triangle” the nose draw two.
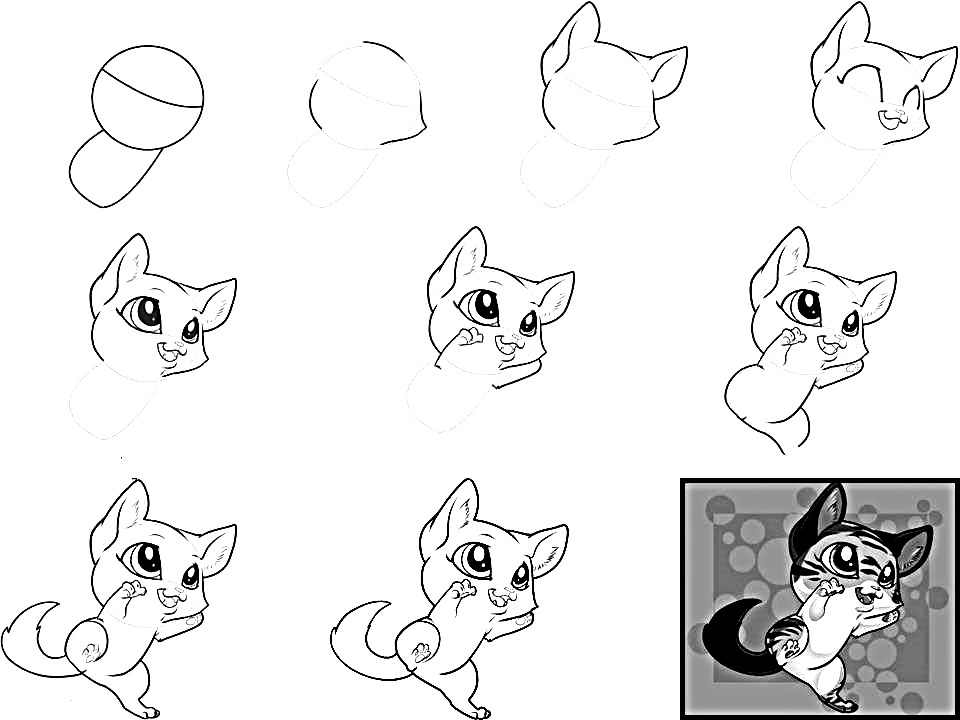
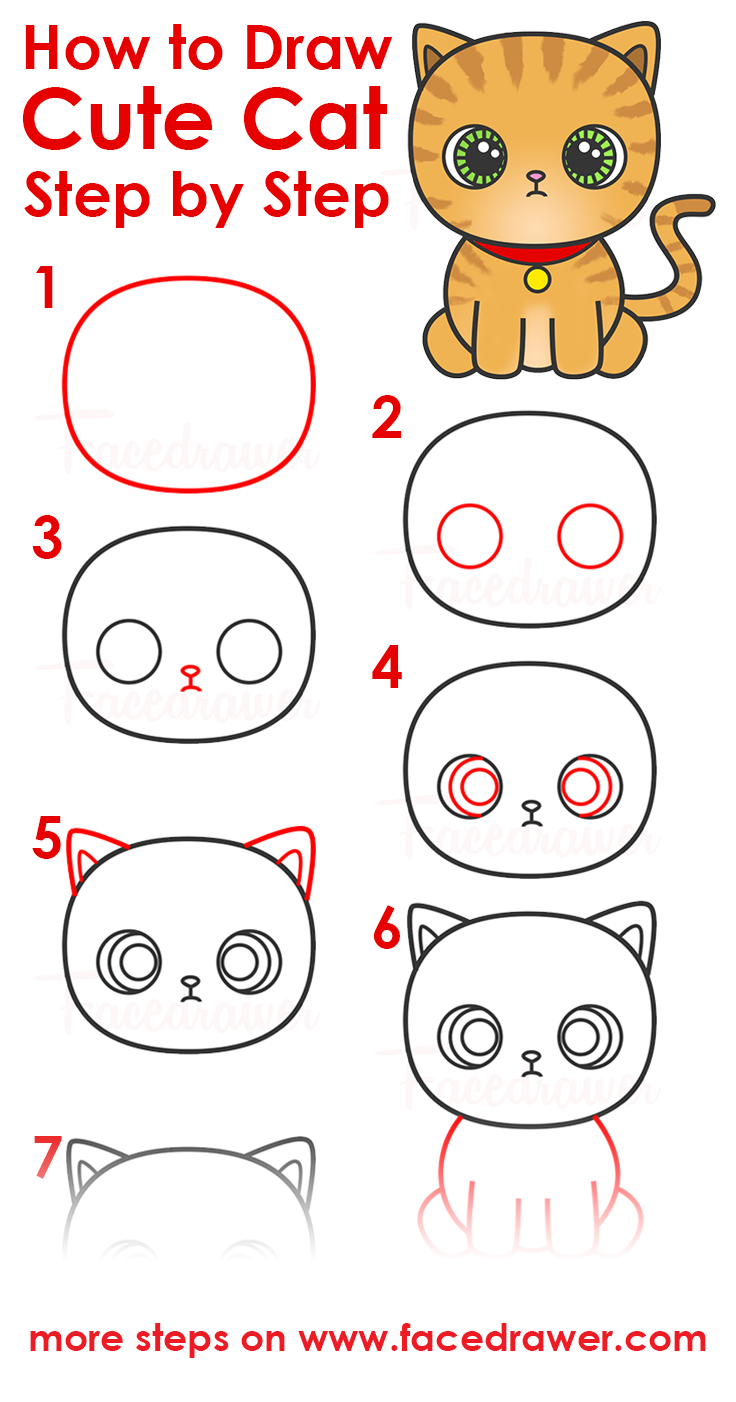
To draw a cat you simply use the empty practice sheet and copy the cat from the grid guide on to the practice sheet. How to draw a cat step by step. By adding an oval shape just right below the circle shape to make the cat body.
Cut out a series of thin vertical lines on the outline, making sure to smooth out the cuts with the. Connect a line upward from the bottom of the paw, extending up the cat’s body to represent a leg. It’s best if you use a pencil to sketch the cat faintly and then use an eraser to rub out any mistakes.
How to draw anime cat 10 stepbystep drawing instructions for

How to Draw Cute Kawaii Kitten / Cat Playing with Yarn from Number 8
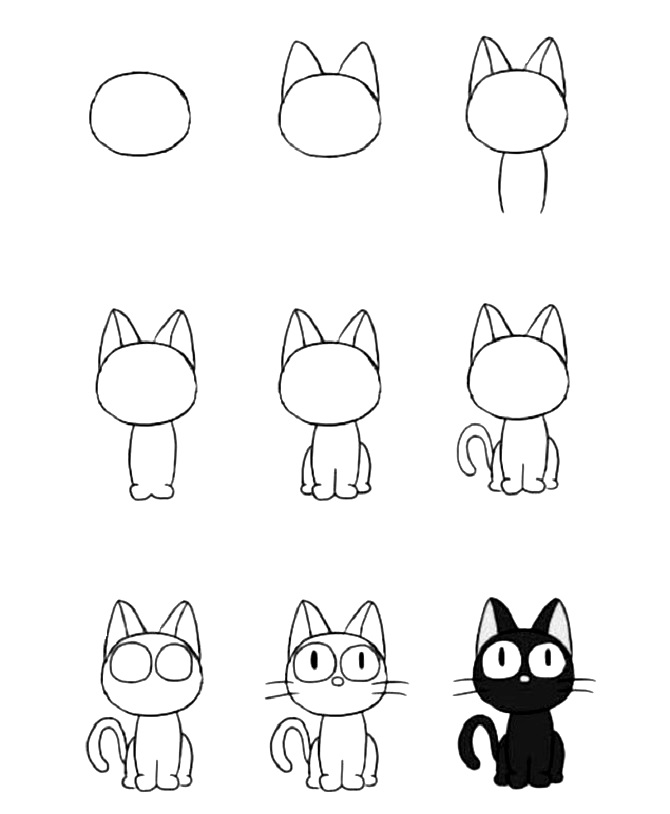
How to draw anime cat 10 stepbystep drawing instructions for
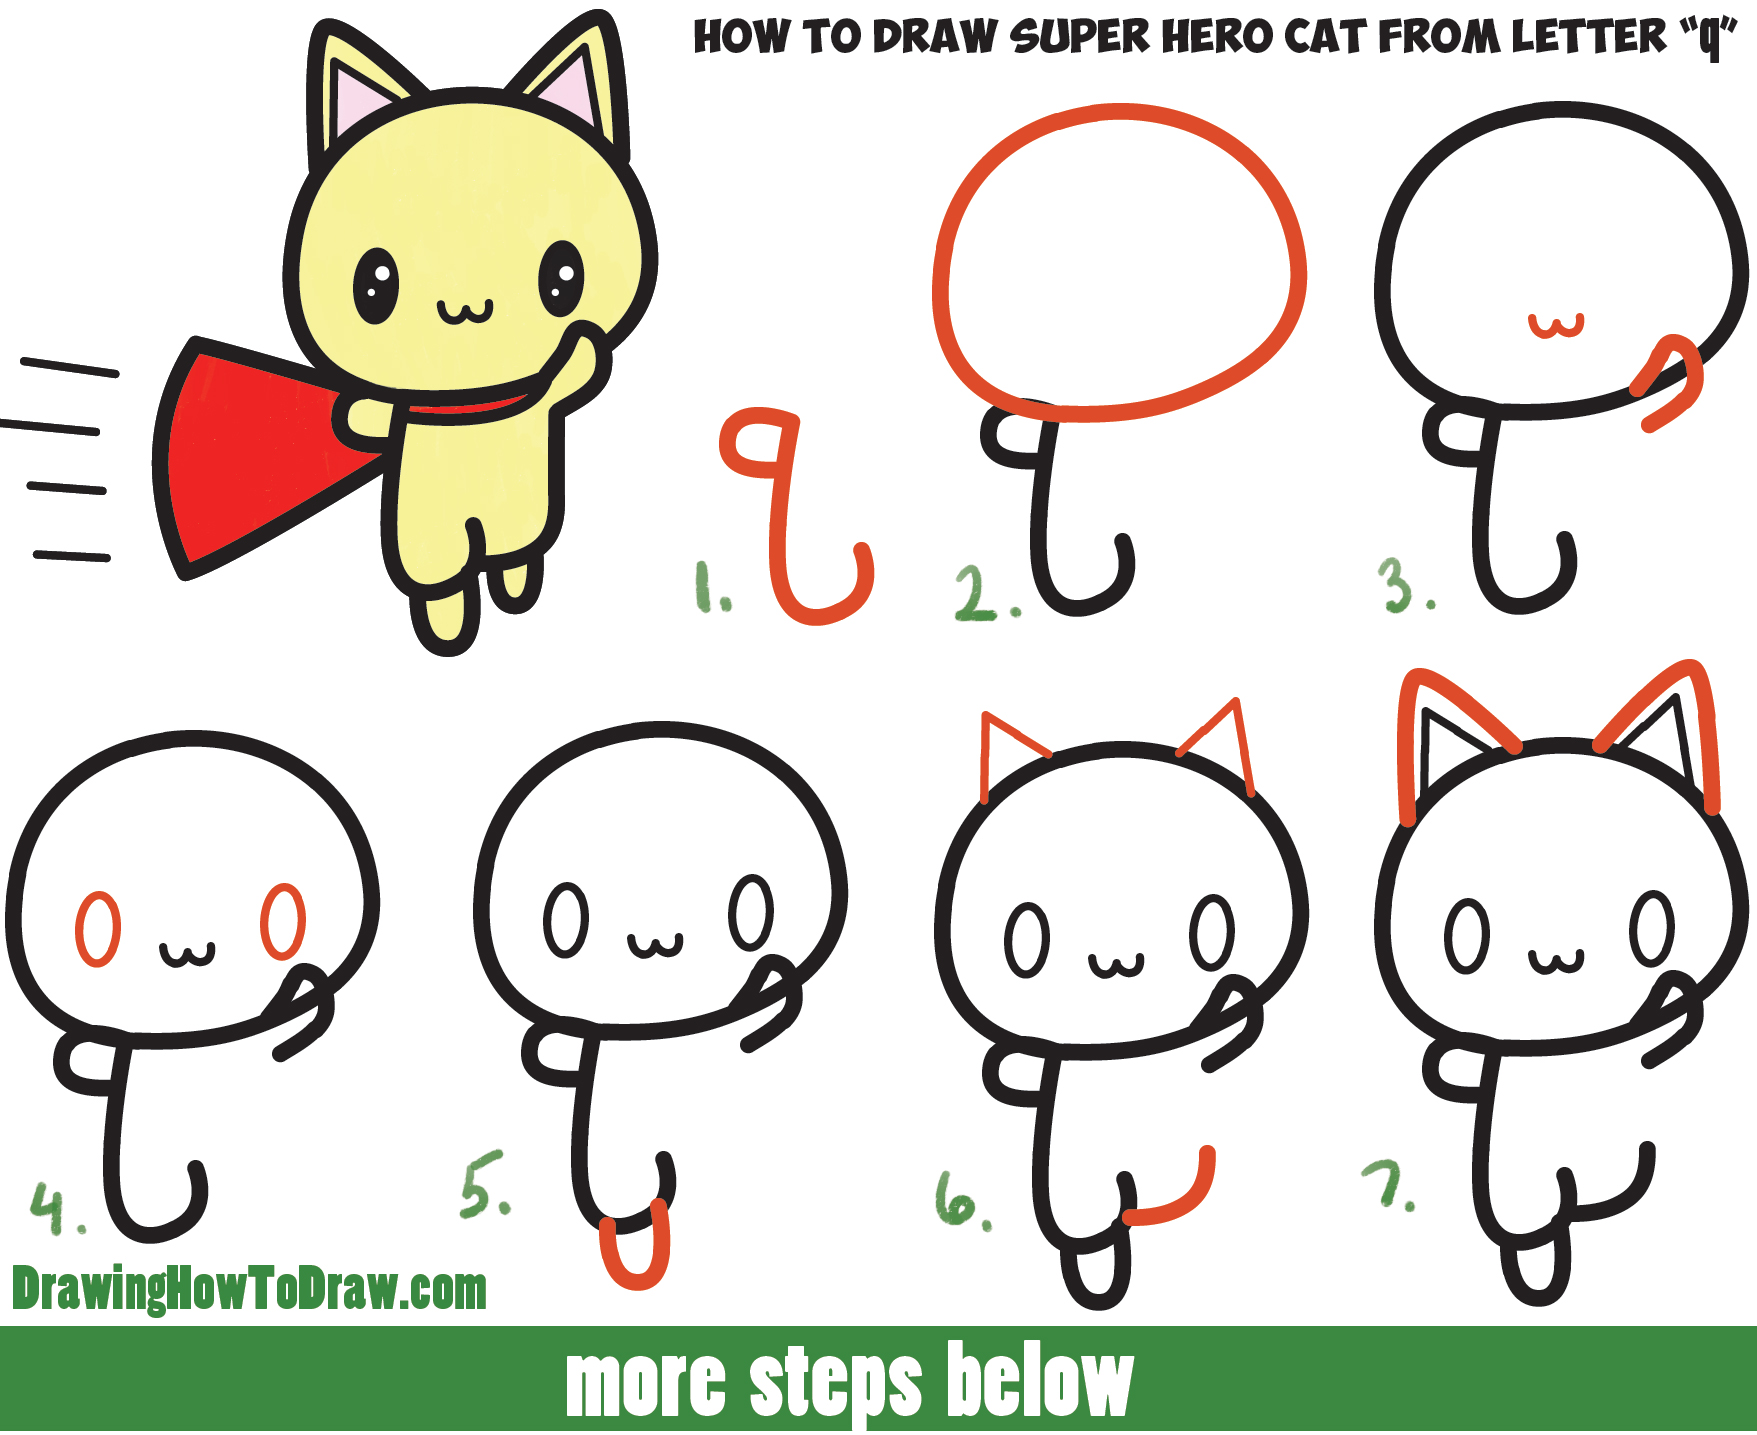
How to Draw a Cute Cat Super Hero (Kawaii) with Easy Step by Step
Easy Cat Drawing Step By Step at Explore

How to Draw a Cute Kitten Playing on a Soccer Ball Easy Step by Step
How To Draw a Cat (Step by Step with Pictures) Cool2bKids
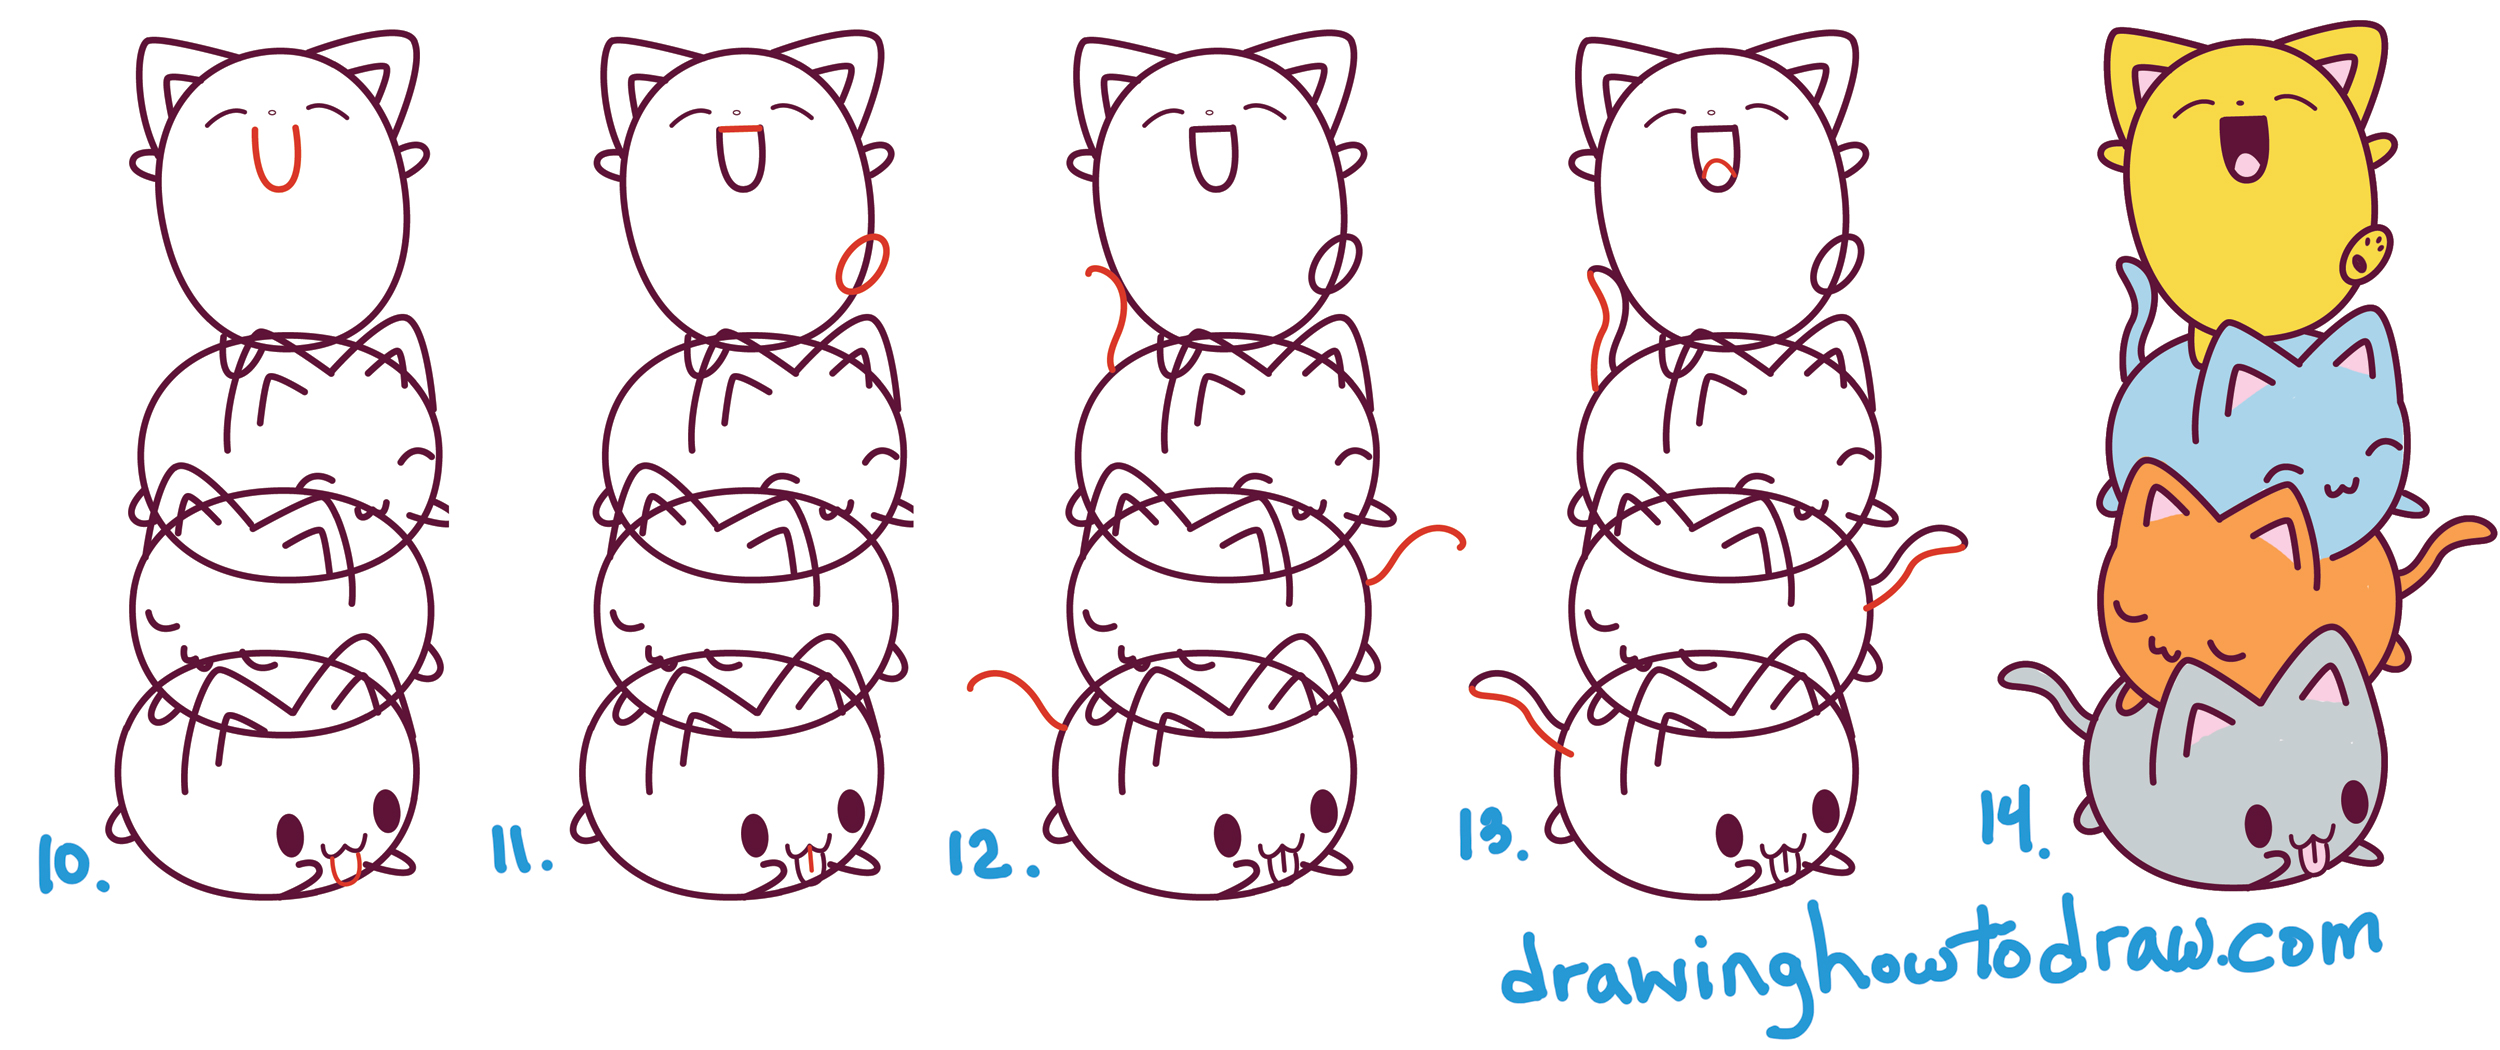
How to Draw Cute Kawaii Cats Stacked on Top of Each Other Easy Step
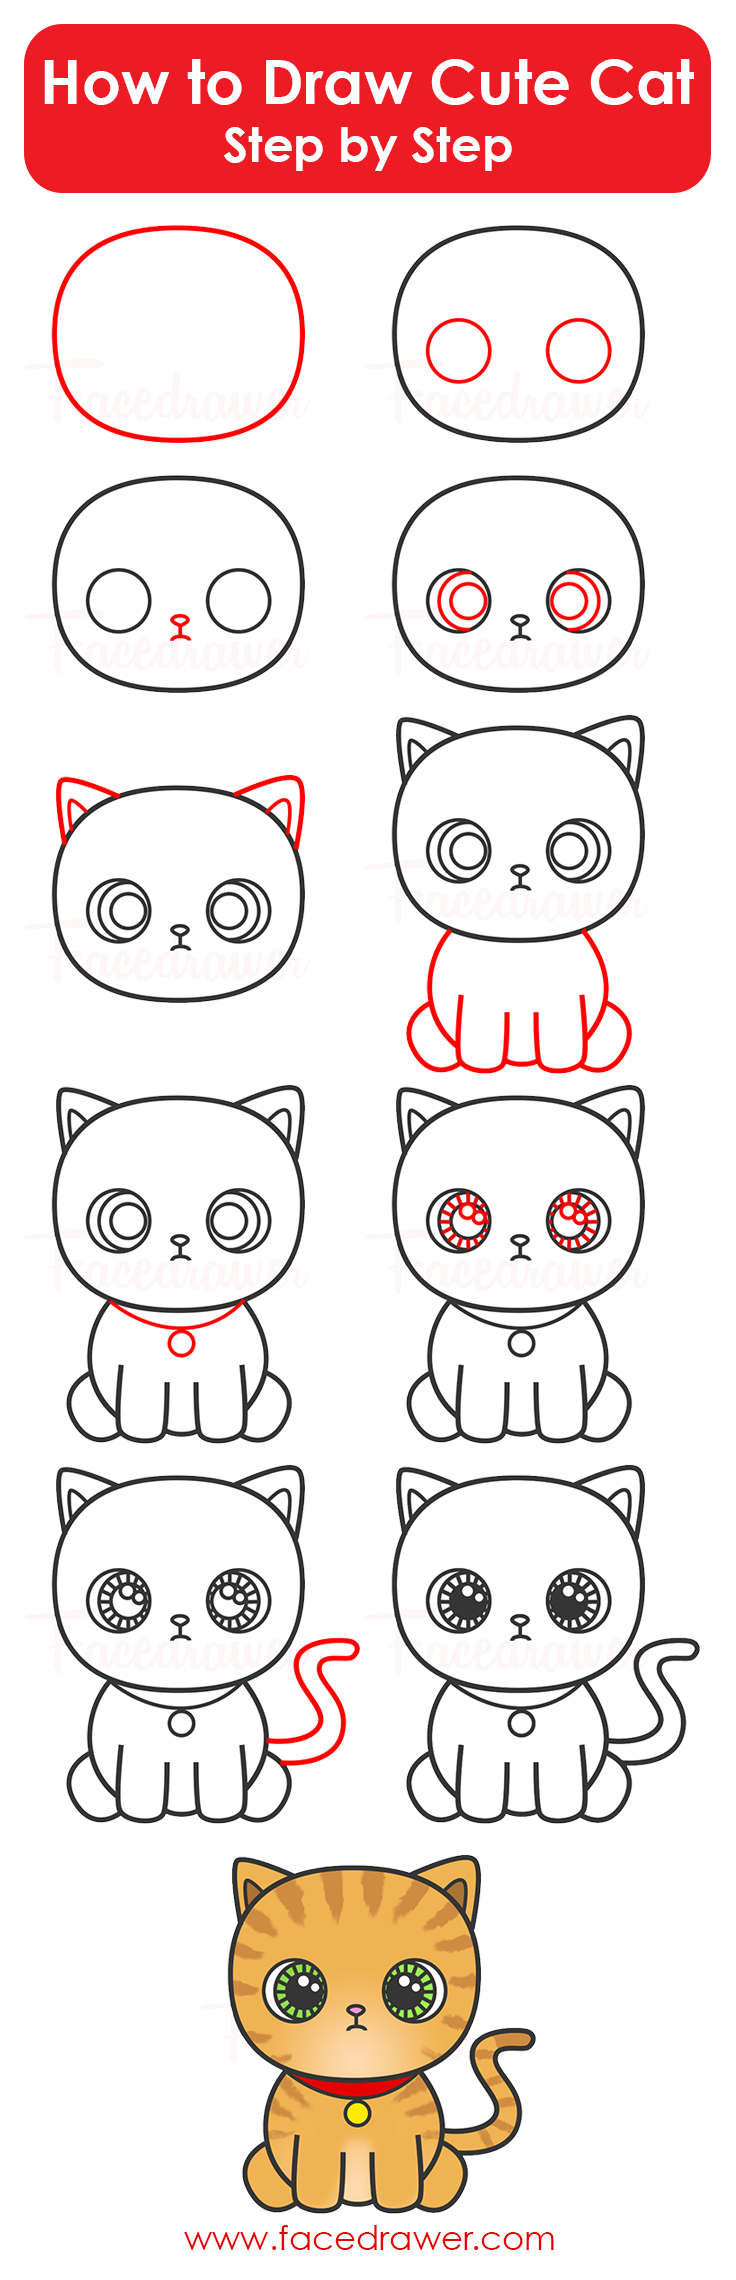
how to draw cute cat step by step infographic Facedrawer

Learn how to draw a cute Cat step by step ♥ very simple tutorial cat

How to draw a cat step by step 10 drawing tutorials for beginners
Big Guide to Drawing Cartoon Cats with Basic Shapes for Kids How to

Funny cats how to draw a cat
